


VPS
Linux VPS
Windows VPS
OpenVZ VPS
Forex VPS Hosting
Dedicated Hosting
Hosting
Web Hosting
WordPress Hosting
Windows Hosting
Web Hosting For Agencies
Use Cases
Hosting Solutions
Linux VPS
Windows VPS
OpenVZ VPS
Dedicated Servers
Server Deals
Cloud Backup
Servers For Agencies & Reseller
Resources
Rent-A-Server
Cloud
Data Center Designer
Customer References
Cloud Solutions
Compute Engine (IaaS)
Managed Kubernetes
Backup
Our Strengths
Data Backup & Disaster Recovery
Digitalization for SMEs
On-Premise vs Cloud Computing
Domains
Domain Names
Domain Transfer
SSL
SSL Certificate
Company
About Us
Data Centers
Personal Consultant
Website Checker
Favicon Generator
SEO Checker
Whois Lookup
SSL Checker
IP Address Checker
Domain Check
Partner Programs
Partner Program
Affiliate Program
Partner Network
Referral Program

This article will guide you step by step DNS zone.
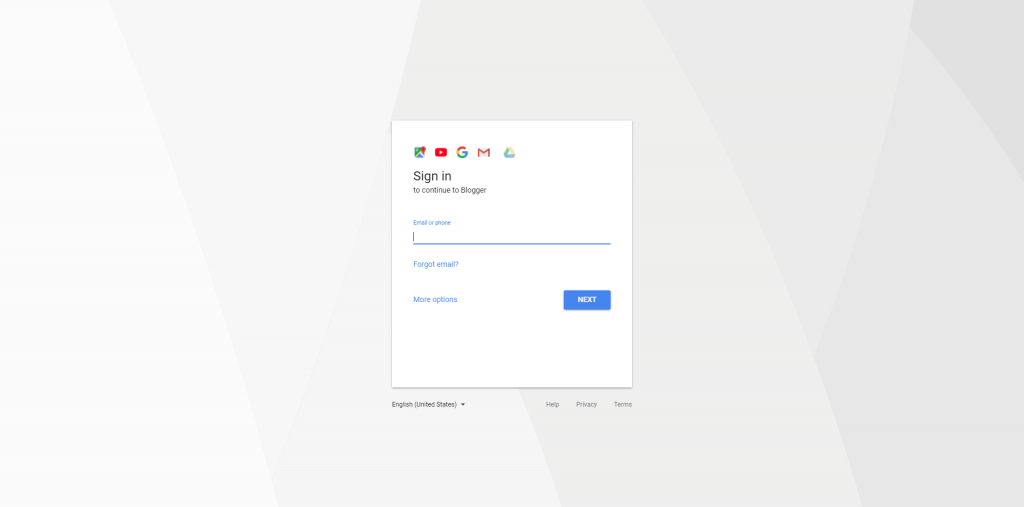
1. Login to your Blogger by clicking on the “SIGN IN” option on the top right of your screen shown as per the below image:-
2. Login in with your Google account as per below:-
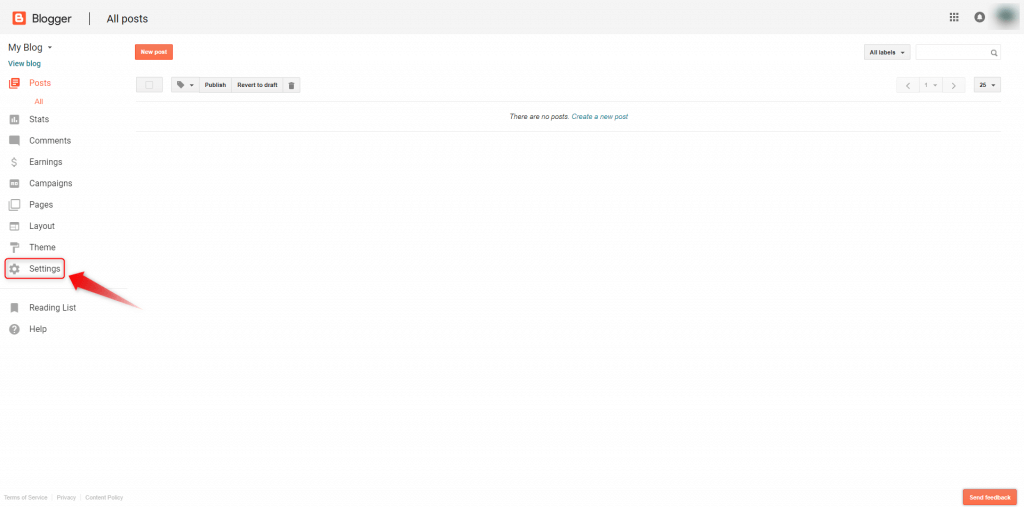
3. You will see such screen when you are inside and you need to click on “Settings” as per below image:-
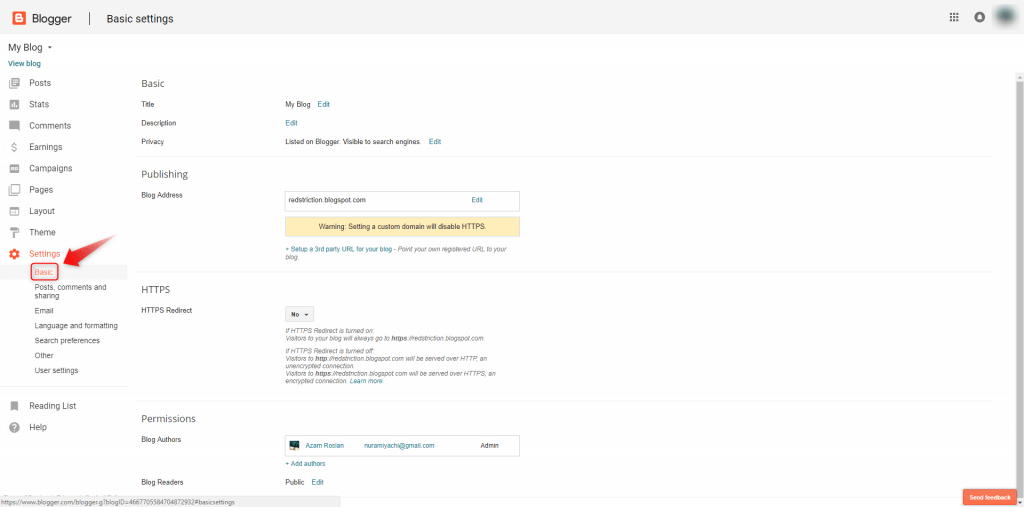
4. Once you are inside the “Settings” page just make sure that is at the “Basic” section and if not just click on it to get to as per the below page:-
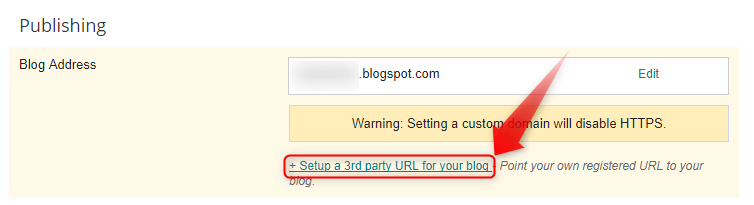
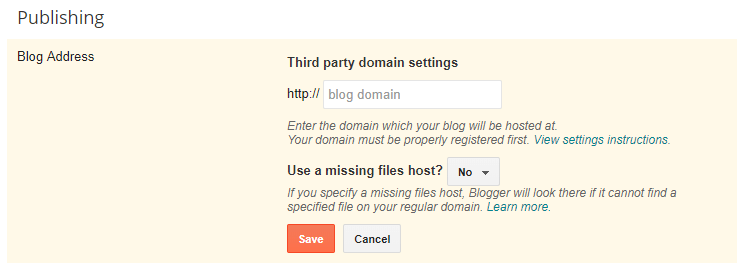
5. Click on the “+ Setup a 3rd party URL for your blog” to get more settings.
6. Once click you will see as per below image:-
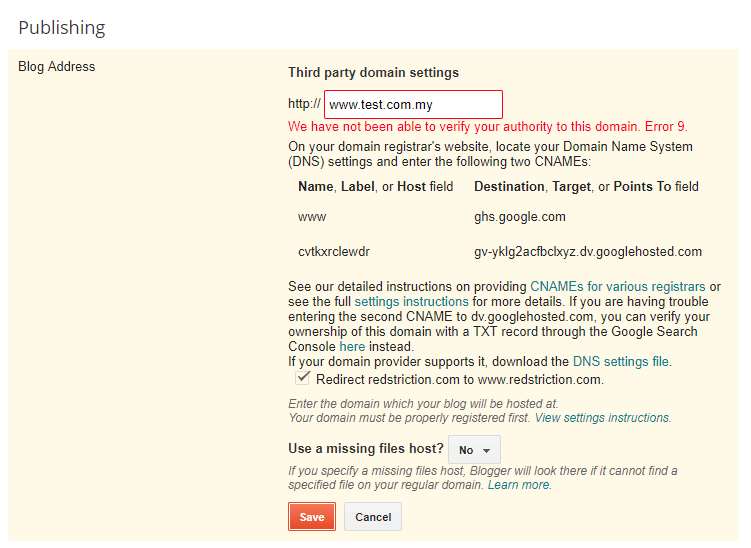
7. Apply the domain name inside the field as per below and click “Save” to get further instruction as per the below image:-
8. This is where you log in to your hosting control panel to edit add in these records:-
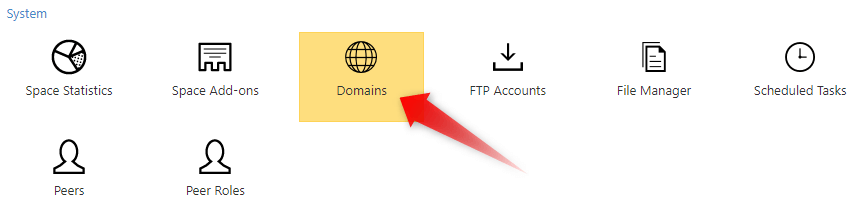
1. Login to your Control Panel and click on “Domains”
2. Select the domain involve by clicking on it:-
3. Click on “Edit DNS zone records”:-
4. Click the pencil like icon to edit the “WWW” record and point to the said record provided by Blogger on steps 7.
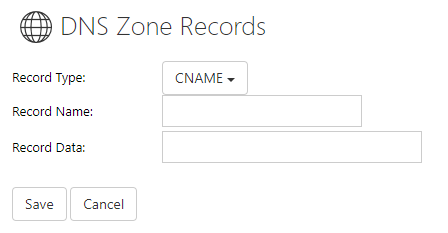
5. Click “Add record“:-
6. Select “CNAME” at the “Record Type” and apply the other record shown from steps 7 and click “Save“.
Here the info General DNS Propagation Information.