
VPS
Linux VPS
Windows VPS
OpenVZ VPS
Forex VPS Hosting
Dedicated Hosting
Hosting
Web Hosting
WordPress Hosting
Windows Hosting
Web Hosting For Agencies
Use Cases
Hosting Solutions
Linux VPS
Windows VPS
OpenVZ VPS
Dedicated Servers
Server Deals
Cloud Backup
Servers For Agencies & Reseller
Resources
Rent-A-Server
Cloud
Data Center Designer
Customer References
Cloud Solutions
Compute Engine (IaaS)
Managed Kubernetes
Backup
Our Strengths
Data Backup & Disaster Recovery
Digitalization for SMEs
On-Premise vs Cloud Computing
Domains
Domain Names
Domain Transfer
SSL
SSL Certificate
Company
About Us
Data Centers
Personal Consultant
Website Checker
Favicon Generator
SEO Checker
Whois Lookup
SSL Checker
IP Address Checker
Domain Check
Partner Programs
Partner Program
Affiliate Program
Partner Network
Referral Program

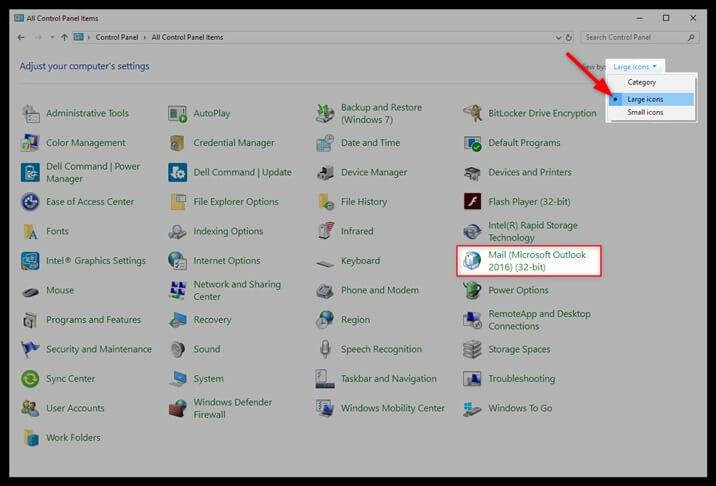
Step 1
Open Windows Control Panel.
On your desktop taskbar, search for “Control Panel”. Click on “Control Panel”.
Step 2
Select Mail (Microsoft Outlook 2016).
Sort the “View by” tab by “Large icons” and select “Mail (Microsoft Outlook 2016).
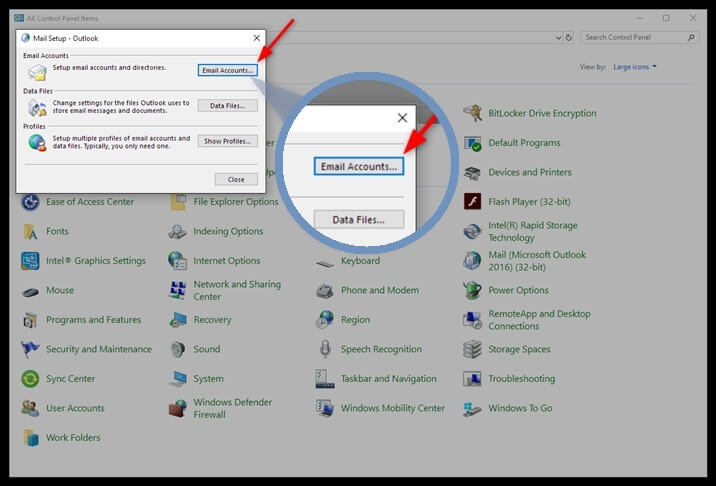
Step 3
Select “Email Accounts”.
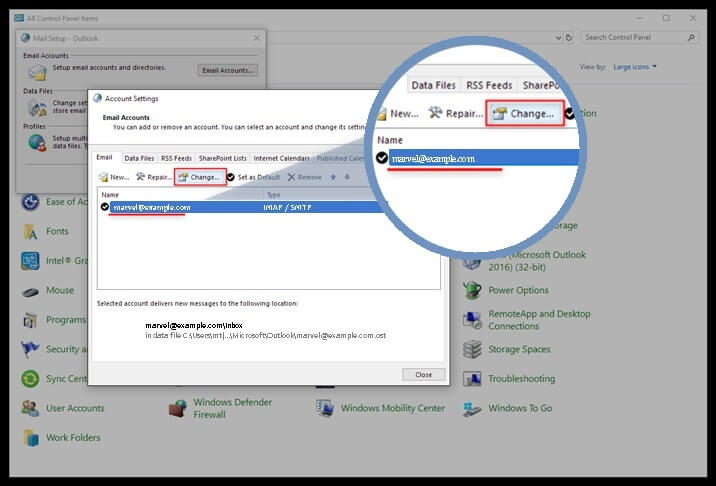
Step 4
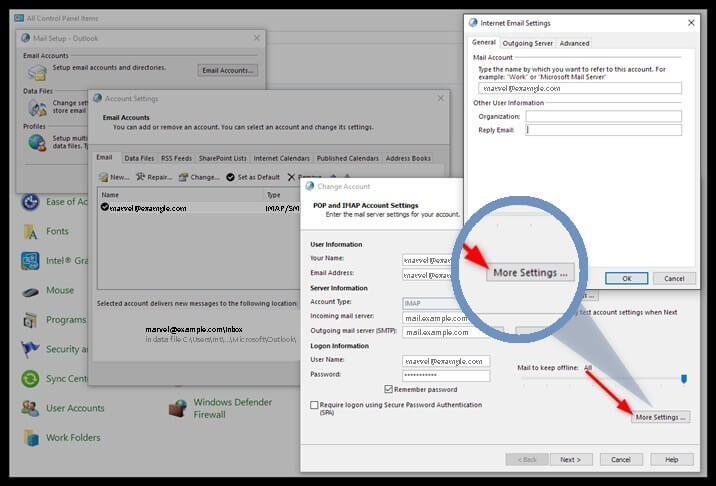
Select an email account and tap “Change”.
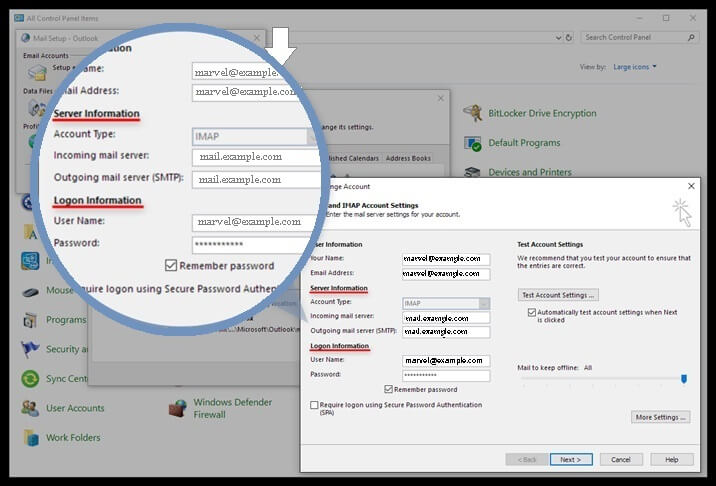
Step 5
Check Mail Setup – Outlook.
Check Mail Setup – Outlook settings are input correctly:
– Account Type: IMAP / POP (Recommended: IMAP)
– Incoming Mail Server: mail.example.com (IMAP) / mail.example.com (POP)
– Outgoing Mail Server: mail.example.com
– User Name: your email address in full i.e. ([email protected])
– Password: Login password for Webmail.
Step 6
Select “More Settings”.
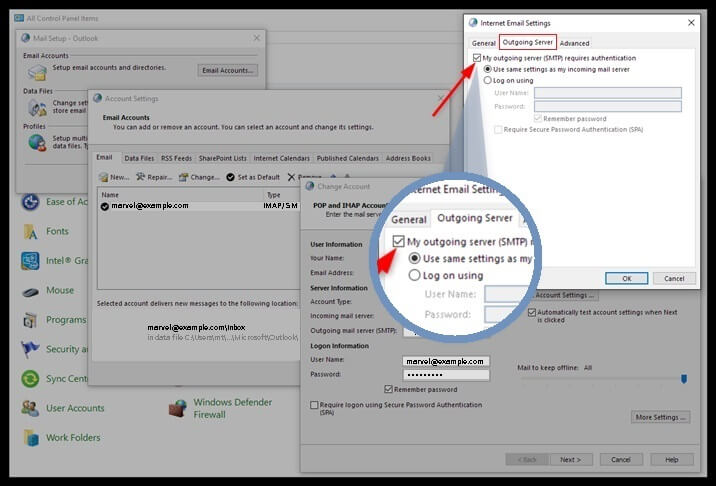
Step 7
Check additional Outgoing Server settings.
1. Move your cursor to the tab “Outgoing Server” next to “General”. Click on the tab “Outgoing Server”.
2. Check the box “My outgoing server (SMTP) requires authentication”.
3. Check the box “Use same settings as my incoming mail server”.
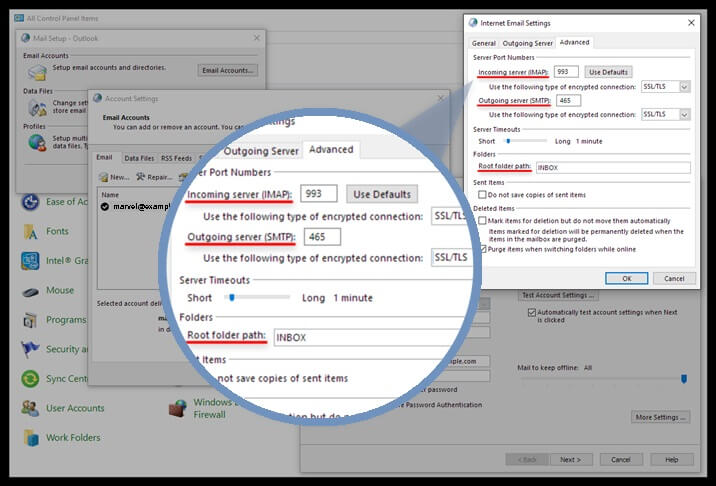
Step 8
Check Advanced Tab (ports, encryption, and root folder path)
1. Move your cursor to the “Advanced” tab. Click on the “Advanced” tab.
2. Check whether ports and encryption are correctly configured.
Default settings:
– Incoming server (IMAP) – port 993 – encryption SSL/TLS
– Outgoing server (SMTP) – port 465 – encryption SSL/TLS
Note: If you prefer POP as account type, below is the setting to enter in Incoming Server under Advanced Tab for port and encryption.
3. Ensure “INBOX” in capital letter is entered in the Root Folder path.
4. Click “OK”.
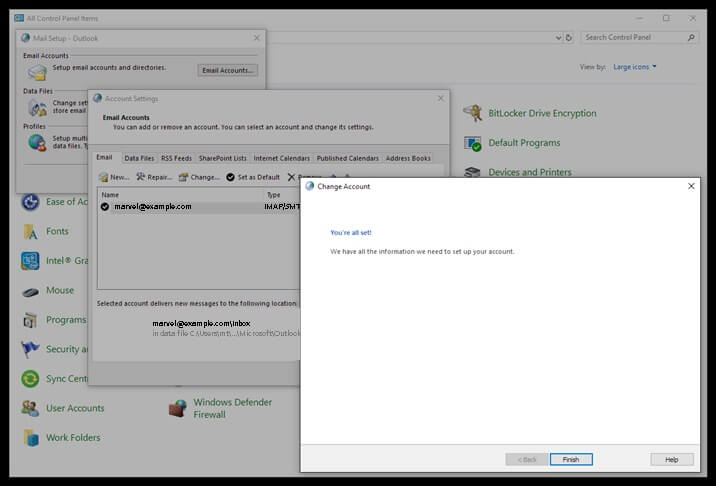
Step 9
SAVE your settings.
Click NEXT and Outlook will proceed to test the account settings.
Click CLOSE when testing is completed.
Click FINISH to complete setup.
Learn more here.